Setup
Start by installing jenkins and the java run-time package to run jobs on the Built-in Node:
sudo wget -O /usr/share/keyrings/jenkins-keyring.asc https://pkg.jenkins.io/debian-stable/jenkins.io-2023.key
echo "deb [signed-by=/usr/share/keyrings/jenkins-keyring.asc]" https://pkg.jenkins.io/debian-stable binary/ | sudo tee /etc/apt/sources.list.d/jenkins.list > /dev/null
sudo apt-get update
sudo apt-get install jenkins openjdk-17-jdk-headlessConfiguration
First-time setup
You'll need to set the "prefix" so that the reverse proxy remapping to <your domain>/jenkins works.
sudo systemctl edit --full jenkins
and set:
Environment="JENKINS_PREFIX=/jenkins"
You might want to set a longer startup timeout on a slow machine while you're at it:
TimeoutStartSec=600
The jenkins server should start right after installation; if it doesn't, you may have to enable it by running:
sudo systemctl enable jenkins
and start it by running:
sudo systemctl start jenkins
Now browse to http://<server IP>:8080 to start the first-time configuration.
The process is guided and fairly straightforward, I started with the suggested plugins and installed the ones I needed later on.
Reverse proxy
Jenkins will moan about your connection being unsafe (plain HTTP instead of HTTPS) but that won't prevent it from working.
If you intend to open jenkins up over the internet however, this is mandatory.
One good way of doing this is to set NGINX up as a reverse proxy and include the following in your /etc/nginx/sites-available/default:
##
## PUT THIS INSIDE THE FIRST "server" block
##

location /jenkins
{
   proxy_http_version 1.1;
   proxy_set_header Upgrade $http_upgrade;
   proxy_set_header Connection "Upgrade";
   proxy_set_header Host              $http_host;
   proxy_set_header X-Real-IP         $remote_addr;
   proxy_set_header X-Forwarded-For   $proxy_add_x_forwarded_for;
   proxy_set_header X-Forwarded-Proto $scheme;
   proxy_set_header Accept-Encoding "";
   proxy_set_header X-NginX-Proxy true;

   add_header   Front-End-Https   on;
   proxy_connect_timeout     600;
   proxy_send_timeout        600;
   proxy_read_timeout        600;
   location /jenkins/ {
       rewrite    /jenkins/(.*) /jenkins/$1 break;
       proxy_pass http://<server IP>:8080/jenkins/;
   }
}

##
## PUT THIS ANYWHERE AT THE TOP LEVEL
##

upstream jenkins {
    server 127.0.0.1:8080;
}
And then back in Jenkins, Manage Jenkins -> System, under "Jenkins location", set Jenkins URL to "https://<YOUR DOMAIN>/jenkins/"
Nodes
Open http://<server IP>:8080/computer/ in your browser.
Right out of the box, you will have a "Built-In Node", i.e. an agent running on the same machine as the server.
As this machine is likely a low-spec kind of hardware, you may want to setup a separate, high-spec machine for heavy-duty jobs like CI/CD and only turn it on when you're submitting software changes.
The only thing to remember when you install Ubuntu Server is to tick the "SSH server" box, as that's what the Jenkins "controller" uses to control the agent.
After installing Ubuntu server, proceed as follows:
- log into the node (via SSH or locally)
- set a static IP address:
- sudo nano /etc/netplan/50-cloud-init.yaml
- replace:
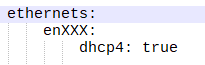
- with:
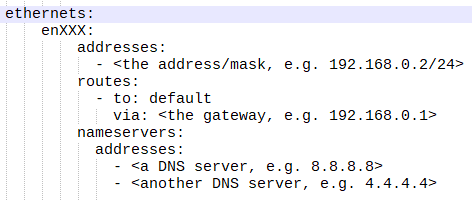
- install the JAVA runtime environment:
- sudo apt install openjdk-17-jdk-headless
- now move back to Jenkins, Manage Jenkins -> Nodes
- New Node
- Name: rather than the hostname, use something that's meaningful to jenkins, e.g. HighPower_001; "HighPower" as this is what it is to jenkins (a high power machine), and 001 as you may want more in the future
- Permanent node
- Description
- Number of executors: this is the number of jobs this node should be able to run in parallel; at least the number of CPU cores, as each is one process
- Remote root directory: a directory the login has access to, e.g. <home>/jenkins
- Labels: HIGHPOWER
- Launch method: Launch agents via SSH
- Host: host's IP address
- Credentials: create one with the user/pass for that machine
- Host key verification strategy: I normally use "Non verifying Verification Strategy" (i.e. "none") because these are all local machines I
- Availability: Bring this agent online when in demand, and take offline when idle
- In demand delay: 0 (you want the node to come online as soon as it's needed)
- Idle delay: 30 (just a suggestion)
Software setup for building and pushing docker images
Proceed as follows:
- install and configure docker
- sudo apt install docker.io
- sudo usermod -a -G docker <DOCKER ADMIN ACCOUNT>
- sudo nano /etc/docker/daemon.json
- copy-paste the following:
{"insecure-registries": ["192.168.0.100:5020"]}
to allow pushing and pulling images to the local server "insecurely" (just HTTP, no HTTPS)
Accounts and security
Always shut the NGINX proxy down (simply comment the "location /jenkins" block out and sudo systemctl reload nginx) while tweaking security settings.
Go to Manage Jenkins -> Security and under "Authorization", change "Anyone can do anything" to whatever suits you, most likely "Matrix-based security", so that you can assign various roles to users/groups.
If you want to fine-tune access to each job, you can select "Project-based matrix authorization strategy"; this will, by default, apply the global matrix to each job unless a job-specific matrix is configured.
While fiddling with this you may accidentally lock yourself out -yes, Jenkins allows you to remove "Administer" privileges to everyone or rely on a badly configured account base, e.g. LDAP. If this happens, you can quickly open jenkins up again config.xml (sudo nano /var/lib/jenkins/config.xml) and set the useSecurity tag to false. You will then be able to manage Jenkins without even logging in and restart configuring.
To manage users, go to Manage Jenkins -> Users.
Back to top
Jobs
To create a job, just click "New Item" on the left pane.
You can create folders to better organize your jobs -just create a Folder instead of a job, enter it and then click New Item.
Freestyle jobs
The simplest kind.
You can configure everything about it by clicking Configure on the left pane, everything is pretty self explanatory and well documented.
The GUI nature makes them easy to set up but difficult to maintain (track changes, store them in SCMs along with software projects) and have limitations, such as only one trigger, only one node, a fixed sequence of "pre" "build" and "post". That would just be one of many "stages" in a pipeline.
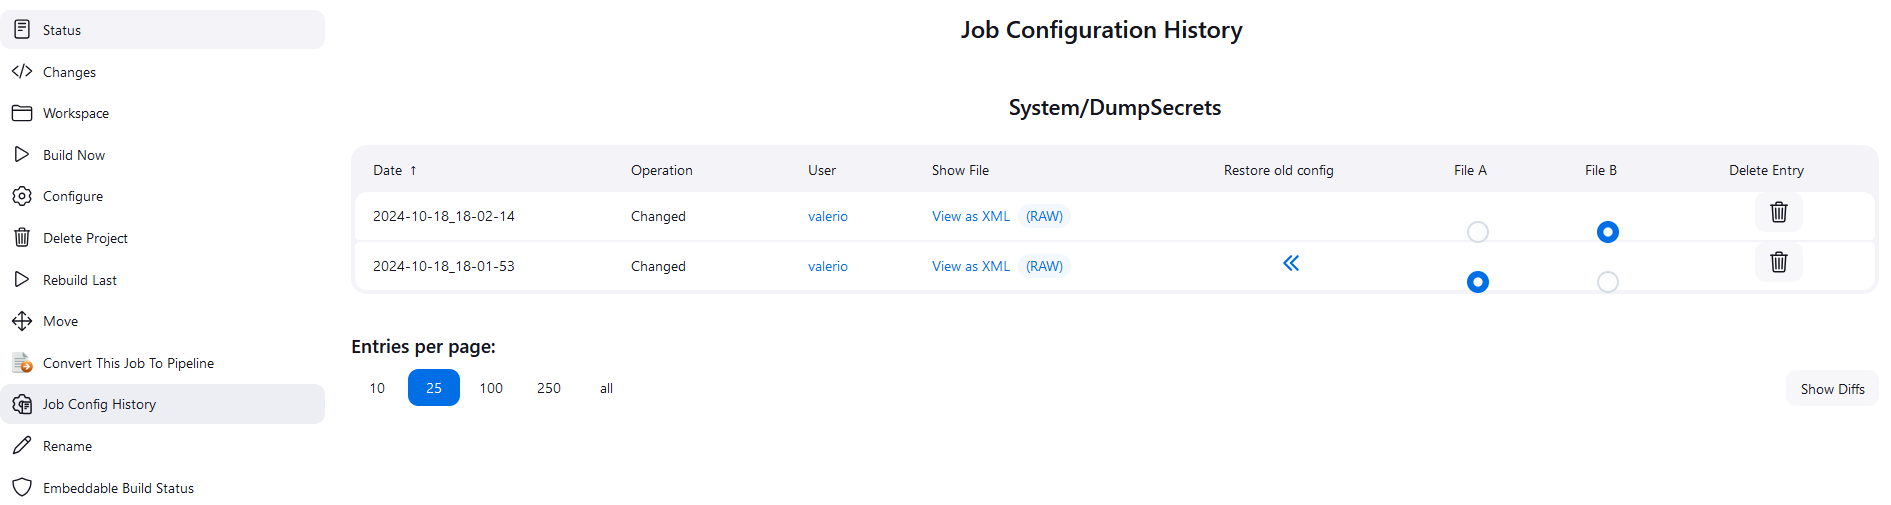
The settings are stored in a file called "config.xml" in /var/lib/jenkins/jobs/<parent directories>jobs/<job name>, so you have the option to manually back it up somewhere, and there is a plugin called "Job Configuration History" that takes care of storing incremental changes and compare them visually:
Pipelines
With pipelines, you can run much more articulate tasks spanning
// Import everything
import jenkins.model.*
import hudson.FilePath
import hudson.EnvVars
import hudson.model.*
import org.jenkinsci.plugins.database.*
import org.apache.commons.dbcp.*

import java.sql.*
import java.util.UUID

// Pipeline opening statement
pipeline
{
  // What node(s) to start the pipeline on, by label
  agent { label 'BUILTIN' }

  // Global pipeline options
  options
  {
    // Show timestamps
    timestamps()
    // Only keep 336 "builds", i.e. job runs. With one running every 30 minutes, that's 7 days
    buildDiscarder(logRotator(numToKeepStr: '336', artifactNumToKeepStr: '336'))
  }

  // Pipeline trigger, namely a cron timer every 30 minutes
  triggers { cron("H/30 * * * *") }

  // Stages
  stages
  {
    // Stage wrapper with a name (it will display in the job/history view)
    stage('Update')
    {
      // What node(s) to run this stage on, by label
      agent { label 'BUILTIN' }
      steps
      {
        // Credentials expansion; they will be obscured if dumped in the job log
        withCredentials([string(credentialsId: '30ba28af-f49d-4727-aa9e-c19512c91d9c', variable: 'CLOUDFLARE_ZONE_API_TOKEN'),
                         ])
        {
          echo '[STAGE] Updating...'

          // Script; can be bat or shell
          script
          {
            // Shell script, python in this case
            sh """#!/usr/bin/python3
import os

print(os.getcwd())
            """
          }
        }
      }

      // What to do when the stage finishes
      post {
        // Always execute right after the stage finishes
        always {
          // Groovy script
          script {
            // Look for patterns; you must escape '\' with '\\'
            def chatter_matcher = manager.getLogMatcher("regexp")

            def HtmlDigest = '';
            if(chatter_matcher?.matches())
            {
              String public_ip_address = chatter_matcher.group(1)

              HtmlDigest = '<span style="color:green;background-color:white;padding:3px">Found</span>'
            }
            else
            {
              HtmlDigest = '<span style="color:red;background-color:white;padding:3px">Not found</span>'
            }
            addBadge(text: HtmlDigest)
            addSummary(icon: "info.gif", text: HtmlDigest)
          }
        }
        // Only execute if the stage was successful ("errorlevel" = 0)
        success {
          script {
            addBadge(icon: "green.gif", text: "Success")
            addSummary(icon: "green.gif", text: "Success")
          }
        }
        // Only execute if the stage was unstable (configurable "errorlevel")
        unstable {
          script {
            addBadge(icon: "yellow.gif", text: "Unstable")
            addSummary(icon: "yellow.gif", text: "Unstable")
          }

          echo "--- unstable block"
        }
        // Only execute if the stage failed ("errorlevel" != 0 and different from "unstable", or no unstable configured)
        failure {
          script {
            addBadge(icon: "red.gif", text: "Failure")
            addSummary(icon: "red.gif", text: "Failure")
          }

          echo "--- failure block"
        }
       // Only execute if the user aborted the job or the abort timer hit
       aborted {
          echo "--- aborted block"
        }
      }
    }
  }
}
Gitlab integration
Proceed as follows:
- In Gitlab:
- open the project and go to Settings -> Access tokens
- click Add new token, call it "Jenkins" or similar
- select Maintainer as Role
- select at least the "api" scope
- click "Create project access token" and then make sure you copy the token somewhere, a temporary text editor window, before continuing
- for the record, this is how you create "project" access tokens; you can otherwise create Group access tokens instead to apply to multiple projects
- In Jenkins:
- go to Manage Jenkins -> Plugins -> Available plugins and install GitLab API Plugin, GitLab Authentication plugin, and GitLab Plugin
- go to Manage Jenkins -> Credentials -> System -> Global, Add Credentials, select Gitlab API token, paste the token you got from Gitlab, enter a meaningful Description and Create
- now go to Manage Jenkins -> System and scroll to the Gitlab section
- tick "Enable authentication for '/project' end-point"
- enter a meaningful "name"
- enter the full URL, e.g. https://<your domain>/gitlab
- in credentials, select the "Gitlab token" you just created; you can add multiple tokens for multiple groups/projects
- Save
- Back to Gitlab:
- open the project and go to Settings -> Integrations -> Jenkins
- tick "Enable integration" and all the triggers you want
- enter the full base path to Jenkins, e.g. https://<your domain>/jenkins/
- enter the "Jenkins project name" as displayed in the Jeknins job page, e.g. "projects/fullstack/myapp_pipeline"
- enter credentials (Jenkins login), Test settings, Save
Now you can use the Gitlab connection in Freestyle jobs and Pipelines (using the gitLabConnection, gitlabBuilds and updateGitlabCommitStatus functions) as a trigger and to provide CI/CD updates.
The "updateGitlabCommitStatus" pipeline function sends updates back to Gitlab so it's all nice and convenient in one place. You can check pipeline states and results under Project -> Build -> Pipelines.
Back to topCredentials vault
This is one of the features I like most about Jenkins. By default it supports user/password pairs, secret files (like private keys) but then most plugins come with their own credentials "manager", such as Gitlab tokens. This gives Jenkins the ability to blur secrets every time they get dumped on the console, either by mistake or
Go to Manage Jenkins -> Credentials and you'll have access to every stored "secret".
Back to top
Comments